A Basic Guide To Use Heat Transfer Vinyl: Design, Prepare & Iron
Reflective vinyl is one of the best available heat transfer sheets available today, it possesses the metallic, reflective base that causes it to reflect backlight when light is shone on it. So the process is quick and really easy to add lettering, images, and decorations to t-shirts.
But, the question that you probably think is how the T-shirt vinyl process works and what you need to get started decorating apparel?
Well, in this guide, we have summed up all you have to know about the heat transfer vinyl.
Synthetic or Natural
Shirts:
The material must have to be 100% cotton but remember your iron will be extremely hot and will be used to press the vinyl onto your garment anywhere from ten to forty seconds. So, try to melt many synthetic fabrics, so you must check the heat transfer vinyl instructions properly.

Why Reflective Vinyl:
It is highly visible after dark-additional benefit of advertising at night and offers long-lasting premium vinyl. Though, it could be a little bit difficult to apply and push your budget a little bit.
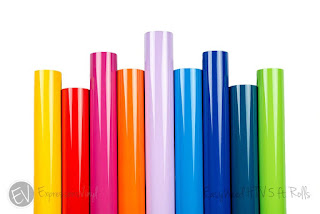
Design:
Before that phase, you must be clear about your design and the best option could be:
Smooth transfers in matte and gloss
Smooth transfers with glitter
Flocked transfers for a soft, fuzzy finish
Patterned transfers
Gold and metallic transfers
Reflective transfers

Designing would be a fun part, as heat transfer vinyl offers plenty of opportunities for creativity when creating your design and a popular & affordable option is the Silhouette Accessories (Cameo).
Preparation:
Always prewash any shirt you’re going to use with vinyl transfers. Because, if don't, the finished shirt may shrink during the first wash.
Once you're done with your artwork try to cut it out using a craft knife or cutting tool and believe us the best option to invest is plotter as its involvement will simplify the process courtesy to its consistent pressure.
Weed it, Flip It, Press it, Peel it.
Ironing
Most vinyl transfers require a very hot iron setting to adhere to the vinyl, so be sure to read the heat transfer vinyl’s instructions before ironing. Before you apply your image to your shirt, make sure and iron the shirt first to remove any wrinkles and prepare the garment.

Next, position the vinyl on the shirt with the vinyl facing down and the backing paper facing up. It is highly advisable to cover the vinyl with a towel or handkerchief, or if you have a Teflon sheet or parchment paper, those are even better.
Follow the manufacturer’s instructions is extremely important!
Also, keep in mind that the entire image must be covered with the iron, so you may have to apply the iron section by section if you’re image is a large design.
Finally, remove the iron and let the transfer cool for about thirty seconds before carefully peeling off the backing paper.
Aviva Wholesale Inc.
If you are looking for the best deals in town for t-shirts, hoodies, raglan shirts, heat presses, heat transfer vinyl as well as Silhouette Cameo equipment please come and visit us to explore our inventory.


Comments
Post a Comment